
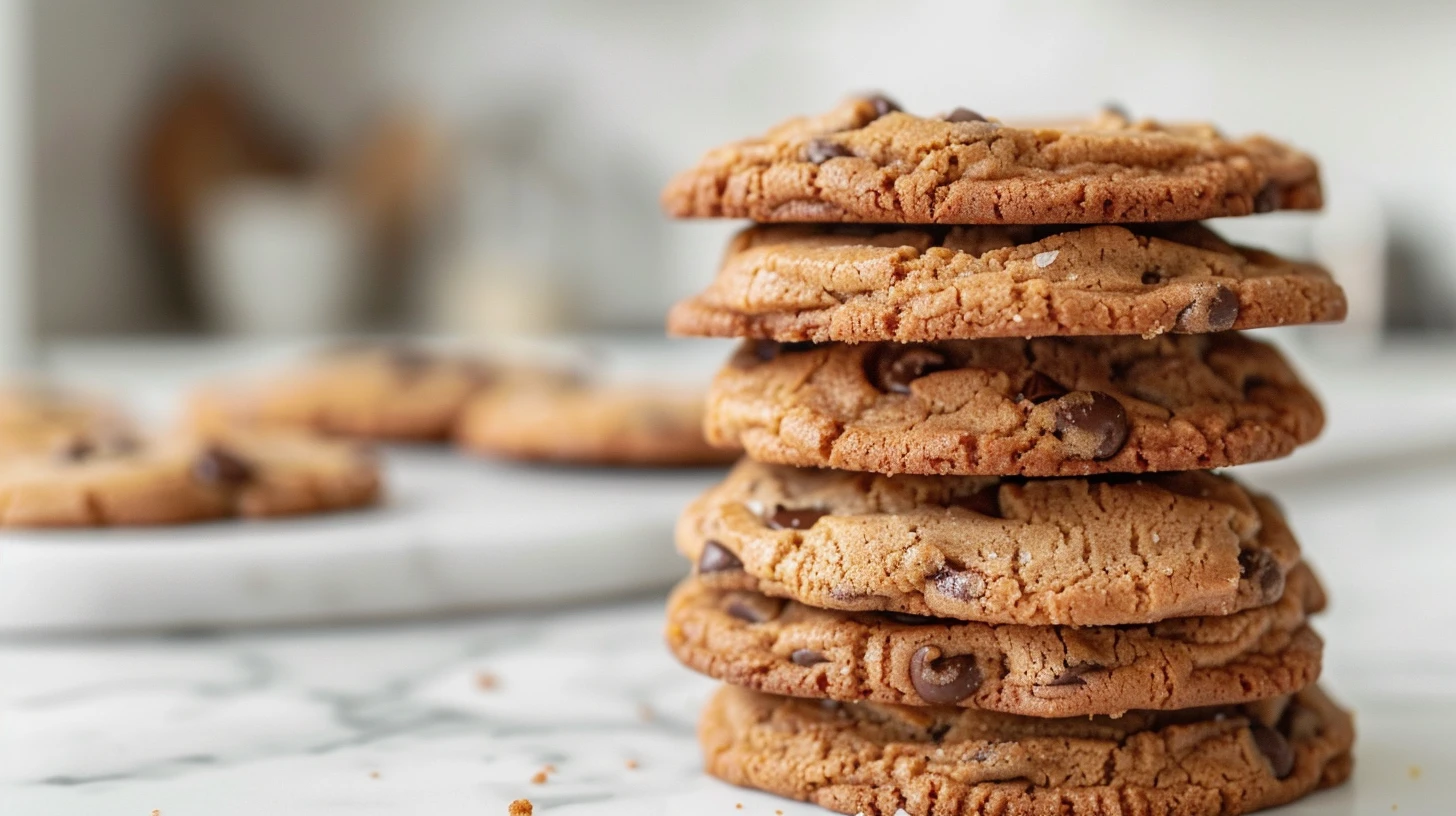
Picture this: the smell of freshly baked cookies filling your kitchen, that perfect golden-brown color, and the satisfying crack as you bite into a cookie that’s crispy on the outside yet delightfully chewy inside. That’s exactly what you’ll get with this foolproof Toll House cookie recipe.
The original Toll House cookie recipe has been America’s favorite for over 80 years, and there’s a good reason why. Back in 1938, Ruth Wakefield introduced her famous creation at the Toll House Inn in Massachusetts, setting the stage for what would become the classic chocolate chip cookie we all know today.
But here’s the thing – most people mess up this classic recipe without even knowing it.
I’ve spent years perfecting this toll house cookie recipe, testing different techniques, temperatures, and timing. What I’m sharing with you today isn’t just another cookie recipe copied from the back of a chocolate chip bag. This is the result of countless batches, kitchen failures, and sweet successes that taught me the real secrets behind bakery-quality cookies.
You might think making toll house cookies is simple – just mix, scoop, and bake, right? Wrong! There are specific techniques that separate good cookies from absolutely incredible ones. The difference lies in understanding how each ingredient works, when to add what, and most importantly, how to achieve that perfect texture balance.
Whether you’re a complete beginner who’s never touched cookie dough or an experienced baker looking to elevate your cookie game, this comprehensive guide will transform how you approach baking. We’ll cover everything from ingredient selection to storage tips, troubleshooting common problems, and even some creative variations that’ll make your cookies stand out.
By the end of this article, you’ll have all the knowledge and confidence needed to bake toll house cookies that rival any bakery. Your friends and family won’t believe these came from your home kitchen!
Key Benefits
So, what sets this Toll House chocolate chip cookie recipe apart from the rest?
Let me share the unique advantages you’ll discover when you follow this method.
Perfect Texture Every Time: The biggest challenge with cookie recipes is achieving consistent results. Some batches turn out too crispy, others too soft, and many just fall flat. This recipe eliminates the guesswork by providing precise measurements and techniques that deliver the ideal chewy-yet-crispy texture in every single batch.
Restaurant-Quality Results at Home: Professional bakeries have secrets that home bakers rarely know. I’m sharing those insider techniques with you. From carefully controlling the butter’s temperature to mastering the right mixing technique, you’ll discover how to recreate that bakery-style texture and flavor at home.
Foolproof Instructions for All Skill Levels: Whether you’ve never made cookies before or you’re an experienced baker, these step-by-step instructions are designed to prevent common mistakes. Each step includes the “why” behind the technique, helping you understand the science and become a better baker overall.
Customizable Base Recipe: This toll house cookie recipe serves as your foundation for endless variations. Once you’ve mastered this classic base, you’ll have the freedom to play around with mix-ins, flavors, and even baking methods to make it your own.
Time and Ingredient Efficient: Nobody wants to waste expensive ingredients on failed batches. This recipe has been tested extensively to minimize waste while maximizing flavor. Another bonus: the dough freezes beautifully, so you can always bake a batch of fresh cookies whenever the craving hits.
Guaranteed Crowd-Pleaser: These cookies work for every occasion – school bake sales, office parties, holiday gatherings, or simple family desserts. The classic chocolate chip cookie appeals to all ages, and dietary preferences can be easily accommodated with simple substitutions.
Kitchen Success Building: Successfully mastering this recipe builds your confidence for more complex baking projects. The techniques you learn here – proper creaming, ingredient temperatures, baking timing – apply to countless other recipes in your future baking adventures.
Ingredients
Understanding your ingredients is the foundation of exceptional toll house cookies. Each component plays a crucial role in achieving that perfect texture and flavor, so let’s break down what you need and why each ingredient matters.
Butter (1 cup, softened): The backbone of your cookie dough, bringing richness and a tender crumb. Room temperature butter is absolutely essential – it should give slightly when pressed but not be melty. Cold butter won’t cream properly, while melted butter creates dense, flat cookies. The fat content in butter contributes to both flavor and texture, creating those delicious crispy edges while keeping centers tender.
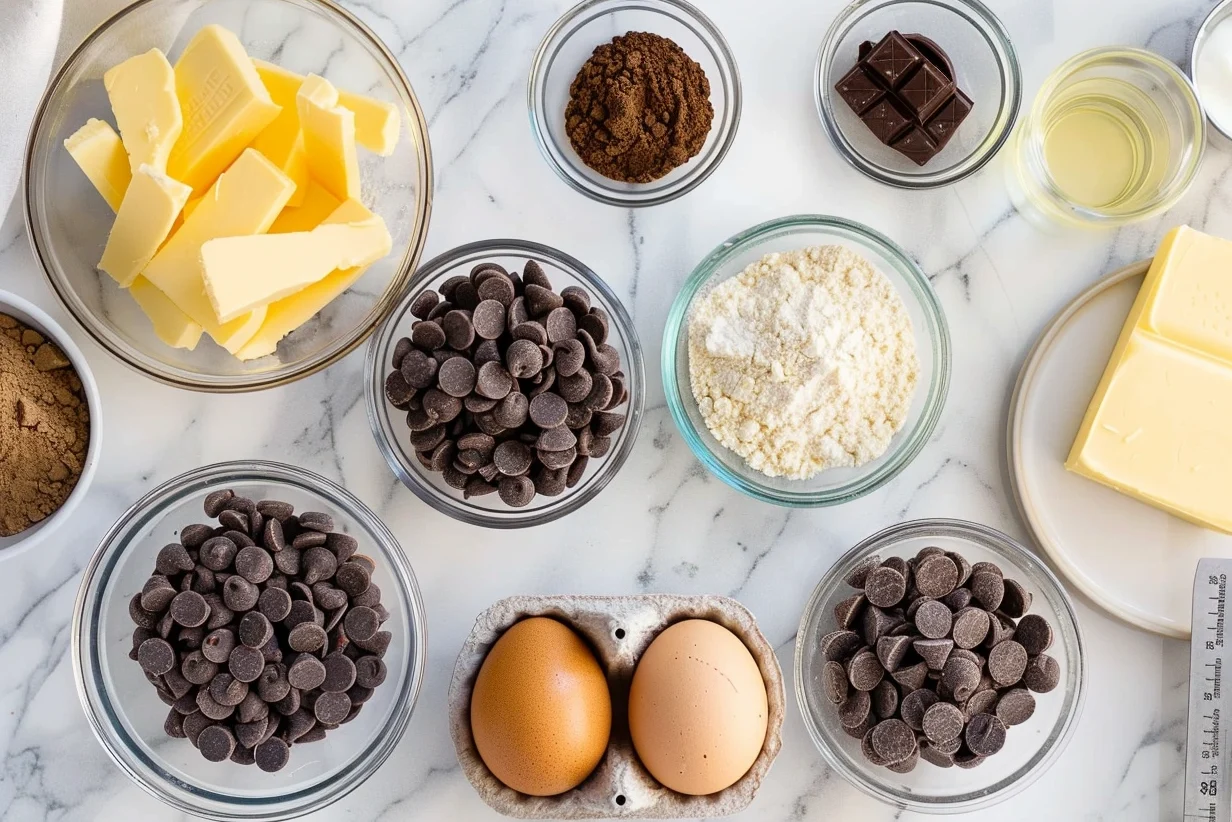
Granulated Sugar (3/4 cup): More than just sweetness, it’s what gives your cookies their crisp golden edges and helps build the perfect structure. The crystals help create air pockets during the creaming process, giving your cookies lift and texture.
Brown Sugar (3/4 cup, packed): The secret weapon for chewy cookies! Brown sugar brings in a hint of molasses, adding both moisture and that rich, caramel-like depth that makes each bite irresistible. Always pack it firmly when measuring. The moisture content keeps your cookies from becoming too crispy and adds incredible depth of flavor.
Large Eggs (2): Your binding agents that hold everything together. Room temperature eggs incorporate better into the batter, creating a smoother dough. Eggs not only hold the dough together but also help create that soft, chewy bite we all love.
Vanilla Extract (2 teaspoons): Pure vanilla extract makes a noticeable difference in flavor. Don’t skip this or substitute imitation vanilla – the real stuff enhances all the other flavors and gives your cookies that bakery-quality taste.
All-Purpose Flour (2 1/4 cups): The foundation of your cookie structure. The right balance of flour is key: too much makes cookies dense and tough, while too little causes them to spread too far. Measure accurately by spooning flour into your cup and leveling off – don’t pack it down.
Baking Soda (1 teaspoon): This leavening agent helps your cookies rise slightly and contributes to that perfect chewy-crispy texture balance. Fresh baking soda works best – if yours is over a year old, replace it.
Salt (1 teaspoon): Don’t skip the salt! A pinch of salt brings out all the flavors and keeps the sweetness in check. Even in desserts, salt is crucial for bringing out the best in every ingredient.
Chocolate Chips (2 cups): The classic choice is semi-sweet chocolate chips, but you can experiment with different types. Higher quality chocolate makes a noticeable difference. Choose chocolate chips that keep their shape in the oven for that classic cookie look and texture.
Pro Ingredient Tips:
- Measure flour by weight (281 g) for the most reliable and consistent results—accuracy matters with cookies
- Use European-style butter for richer flavor
- Room temperature ingredients mix more evenly
- Fresh ingredients always produce better results than old ones
Always start with quality ingredients—your cookies will taste noticeably better. Don’t compromise on butter or chocolate – these are where you’ll taste the difference most clearly.
Instructions
Now comes the fun part – transforming these simple ingredients into perfect toll house cookies. Follow these steps exactly for guaranteed success, and pay attention to the timing and technique details.
Step 1: Prepare Your Workspace (5 minutes) Preheat your oven to 375°F (190°C). This temperature gives you the perfect balance of crispy edges and chewy centers. Line your cookie sheets with parchment paper – this prevents sticking and ensures even browning. Bring all ingredients to room temperature and measure them out before you begin—it makes the process smoother and the results more reliable.
Step 2: Cream Butter and Sugars (3-4 minutes) In a large mixing bowl, combine softened butter, granulated sugar, and brown sugar. Using an electric mixer on medium speed, cream these together until the mixture becomes light and fluffy. The creaming step takes about 3–4 minutes. Don’t rush—it’s what gives your cookies the perfect base for great texture.
Step 3: Add Eggs and Vanilla (1–2 minutes) — Incorporate the eggs one at a time, beating well after each addition to ensure a smooth mixture. Then, add the vanilla for an extra depth of flavor.The mixture might look slightly curdled at this point – that’s completely normal and will smooth out when you add the flour.
Step 4: Combine Dry Ingredients (2 minutes) — In a separate bowl, whisk together the flour, baking soda, and salt until they are evenly combined, then gently fold them into the wet ingredients. This ensures even distribution of the leavening agent and salt throughout your cookie dough. Whisking also aerates the flour slightly.
Step 5: Mix Wet and Dry Ingredients (1-2 minutes) Add the flour mixture to your butter mixture gradually, mixing on low speed just until combined. Don’t overmix – this develops the gluten in flour and creates tough cookies. Stop mixing as soon as you don’t see dry flour.
Step 6: Fold in Chocolate Chips (30 seconds) Using a wooden spoon or spatula, gently fold in the chocolate chips. This gentle mixing preserves the cookie dough’s tender texture while ensuring even distribution of chips.
Step 7: Shape and Space Cookies (5-8 minutes) Using a cookie scoop or rounded tablespoons, drop dough onto prepared cookie sheets. Space them about 2 inches apart – they’ll spread during baking. For evenly sized cookies, a cookie scoop works much better than spoons.
Step 8: Bake to Perfection (9-11 minutes) Bake for 9-11 minutes, until the edges are golden brown but centers still look slightly underdone. Remember, cookies keep baking on the hot pan even after you take them out of the oven, so let them rest before transferring.
Step 9: Cool Properly (15 minutes) Leave cookies on the baking sheet for 5 minutes, then move them to a wire rack so they set perfectly without overbaking.
Critical Success Tips:
- Don’t open the oven door for the first 8 minutes of baking—this keeps the temperature steady and ensures even cooking.
- Rotate pans halfway through if baking multiple sheets
- Each oven is different – watch for visual cues rather than relying solely on time
Pro Tips and Variations
Ready to take your toll house cookies from good to absolutely incredible? These professional techniques and creative variations will set your cookies apart from every other recipe out there.
Temperature Control Secrets: Room temperature ingredients are crucial, but here’s what most recipes don’t tell you – your butter should be 65-68°F exactly. If your butter is too warm, the dough will spread too much—room temperature is the sweet spot. Too cold, and it won’t cream properly. Aim for room temperature. Test by pressing gently – it should give but not leave an indentation.
The Chilling Game-Changer: After making your cookie dough, chill it for at least 30 minutes in the refrigerator. Chilling the dough before baking helps control spread, giving you thicker cookies with a better bite. For even better results, scoop your cookies first, then chill the dough balls for 2 hours.
Size Matters for Texture: Larger cookies (using a #16 cookie scoop) stay chewier inside while developing crispy edges. Smaller cookies become more uniformly crispy. Choose your size based on your texture preference.
The Brown Butter Upgrade: Replace regular butter with brown butter for nutty, caramel-like flavor complexity. Brown your butter, let it cool to room temperature, then proceed with the recipe. This single change transforms ordinary cookies into gourmet treats.
Mix-In Variations That Actually Work:
- Replace half the chocolate chips with chopped walnuts for classic appeal
- A light sprinkle of flaky sea salt before baking takes the flavor to a gourmet level
- For more interesting bites, mix ½ cup of mini chocolate chips with ½ cup of regular ones
- White chocolate and dried cranberries make a cheerful twist, perfect for the holidays.
Texture Customization: Want chewier cookies? Increase brown sugar to 1 cup and decrease white sugar to 1/2 cup. Prefer crispier? Do the opposite. Add an extra egg yolk for extreme chewiness, or substitute shortening for half the butter for extra crispiness.
Altitude Adjustments: Above 3,000 feet? Decrease baking soda to 3/4 teaspoon and increase flour by 2 tablespoons. At higher altitudes, the lower air pressure affects how cookies rise and spread—adjustments may be needed.
Make-Ahead Strategies: Cookie dough freezes beautifully for up to 3 months. Scoop dough balls, freeze on a tray, then transfer to freezer bags. No need to thaw—bake the cookies directly from frozen, simply adding 1–2 minutes to the baking time.
Professional Finishing Touches: Lightly press extra chocolate chips on top of each cookie before baking for a bakery-style appearance.
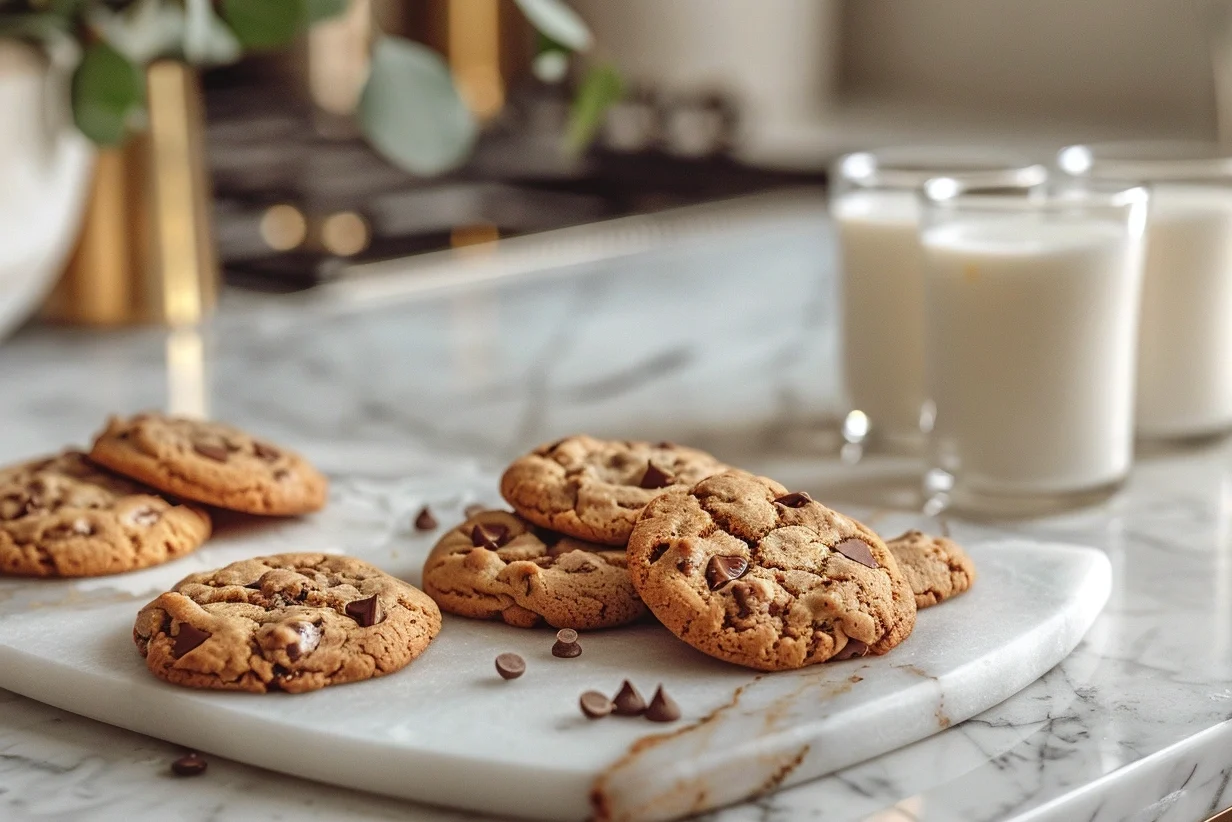
Serving Suggestions
For the best Toll House cookies, think about presentation—pair them with cold milk, warm coffee, or even ice cream. Here are creative ways to serve your perfect cookies that’ll impress everyone and enhance the eating experience.
Classic Comfort Pairings: Nothing beats warm cookies with cold milk – the temperature contrast and complementary flavors create the ultimate comfort experience. For adults, try pairing with coffee or espresso. The bitter notes beautifully balance the cookie’s sweetness.
Elegant Dessert Presentations: Transform simple cookies into sophisticated desserts by serving them alongside vanilla ice cream and drizzled caramel sauce. Create cookie ice cream sandwiches using slightly softened premium vanilla ice cream.
Party and Gathering Ideas: For gatherings, arrange cookies on a wooden board with fresh berries and small bowls of different dipping sauces – melted chocolate, caramel, or even peanut butter. This interactive presentation encourages socializing and lets guests customize their experience.
Gift-Worthy Packaging: Layer cookies in clear mason jars with ribbon, or arrange in decorative tins lined with parchment paper. Include reheating instructions – 10 seconds in the microwave brings back that fresh-baked warmth and softness.
Creative Serving Temperature Tips: Serve cookies at different temperatures for varied experiences. Room temperature offers the full flavor profile, while slightly warmed cookies (15 seconds in microwave) provide that fresh-from-oven comfort. Some even enjoy them chilled from the fridge for a firmer, denser texture.
Holiday and Special Occasion Touches: During holidays, dust with powdered sugar for a festive look, or drizzle with white chocolate for elegant presentation. For birthdays, a giant cookie with a candle makes a fun and playful alternative to cake.
Conclusion
You now have everything needed to create bakery-quality toll house cookies in your own kitchen. This isn’t just another cookie recipe – it’s your roadmap to consistent, delicious results every single time you bake.
Remember, great cookies come from understanding your ingredients, following proper techniques, and paying attention to timing. The difference between average cookies and extraordinary ones lies in these details we’ve covered together.
Don’t be afraid to experiment once you’ve mastered this base recipe. Baking is both science and art, and now you have the scientific foundation to let your creativity shine. Whether you stick with the classic version or try the variations we discussed, you’re equipped for success.
Most importantly, enjoy the process. The joy of baking comes not just from the final product, but from the satisfaction of creating something wonderful with your own hands. Share these cookies with people you care about – that’s when they truly become special.
Happy baking, and here’s to many batches of perfect toll house cookies in your future!
FAQs
What are the ingredients in Toll House cookies? The essential ingredients for authentic toll house cookies are butter, granulated sugar, brown sugar, eggs, vanilla extract, all-purpose flour, baking soda, salt, and chocolate chips. The original recipe uses specific proportions that create the perfect balance of chewy and crispy textures. Quality matters – using real butter, pure vanilla extract, and good chocolate chips makes a noticeable difference in your final cookies.
Want your Toll House cookies soft and chewy? Allow the cookies to rest on the hot pan for 5 minutes, then transfer to a wire rack for that ideal chewy finish. Brown sugar contains molasses, which adds moisture and creates that chewy texture. Also, don’t overbake – remove cookies when edges are set but centers still look slightly underdone. Let them cool on for 5 minutes before transferring. Storing cookies with a slice of bread also helps maintain softness.
What are the seven essentials of any cookie recipe? Flour, butter, sugar, eggs, leavening (such as baking soda), salt, and flavoring (like vanilla). Toll house cookies follow this basic formula with the addition of chocolate chips as the signature mix-in.
Which cookie is the easiest to make? Toll house chocolate chip cookies are actually one of the easiest cookies to make successfully. The recipe is forgiving, uses common ingredients, and doesn’t require special techniques like rolling or chilling. Unlike delicate cookies that need precise timing or temperature control, toll house cookies are sturdy and straightforward. Even beginners can achieve great results by following the basic mixing method and baking guidelines we’ve outlined in this recipe.
some genuinely wonderful work on behalf of the owner of this web site, dead great subject material.
Thank you so much for your kind words. I’m really doing my best to create something good, useful, and enjoyable for everyone who visits the site. Comments like yours truly mean a lot and motivate me to keep improving. Thanks again for taking the time to leave such a lovely message!