
Why This Chocolate Fudge Cake Will Become Your Favorite Bake
Some cakes are pretty. Some cakes are good. And then there’s this one.
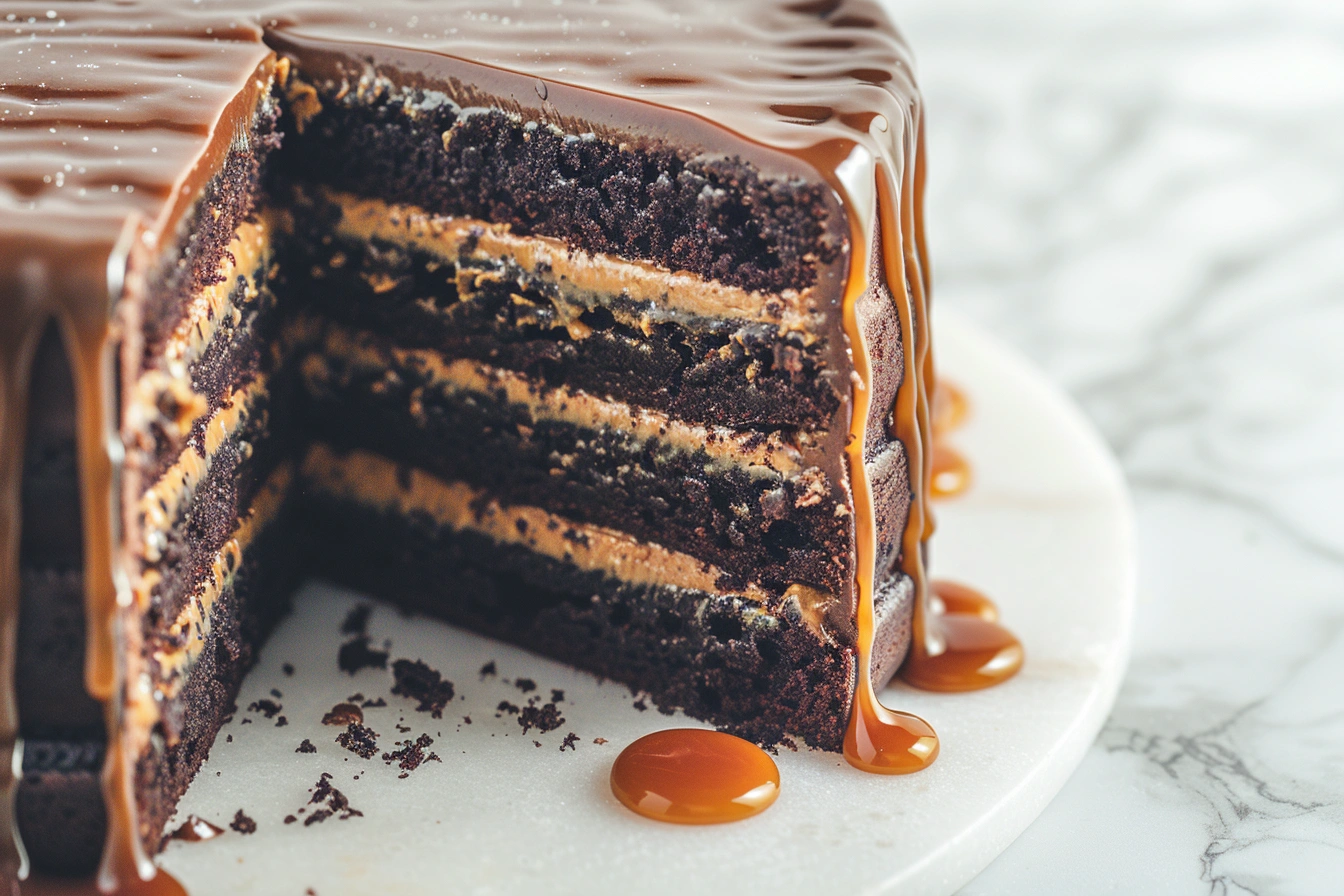
This chocolate fudge cake is the kind of bake that earns silence at the table — the good kind. The kind where everyone takes a bite, pauses, and reaches for another slice before finishing the first. It’s deep, rich, and packed with real chocolate flavor. Layered with a silky salted caramel buttercream, drizzled with homemade salted caramel, and finished with a dark chocolate ganache that sets like a dream — it looks stunning and tastes even better.
Here’s the best part: it’s genuinely easy to make.
No fancy equipment. No patisserie training. Just a bowl, a whisk, and a few quality ingredients. This is the chocolate cake recipe I come back to every single time someone asks for something special. Birthdays, dinner parties, random Tuesdays when someone deserves a treat — this cake fits every occasion.
If you’ve ever struggled with dry layers, greasy frosting, or ganache that just won’t cooperate, this guide has you covered. Every step is clear, every tip is tested, and the result is a moist chocolate fudge cake that genuinely outshines anything from a box mix.
Let’s bake something unforgettable.
6 Reasons This Moist Chocolate Fudge Cake Stands Out
Why does this recipe stand out from every other chocolate cake recipe online? Here’s what makes it worth your time.
It stays moist for days. The combination of hot coffee, oil, and buttermilk in the batter locks in moisture so the cake is rich and fudgy even on day three. No dry crumbs here.
The salted caramel does double duty. It goes into the buttercream and gets drizzled on top. One batch, two uses, maximum flavor payoff.
It’s easy to make from scratch. All the components — the chocolate fudge cake layers, the salted caramel buttercream, the caramel drizzle, and the dark chocolate ganache — follow simple, approachable steps. Nothing requires advanced skill.
It looks like a professional bake. The contrast of the dark ganache against the caramel drizzle and golden buttercream creates a showstopping finish. People will ask if you ordered it.
You can prep ahead. The salted caramel can be made up to a week in advance. The cake layers can be baked the day before and wrapped tightly. Assembly is quick once everything is ready.
It’s customizable. Prefer milk chocolate in the ganache? Go for it. Want an extra layer of caramel between the cake layers? Absolutely. This recipe is a solid base you can make your own.
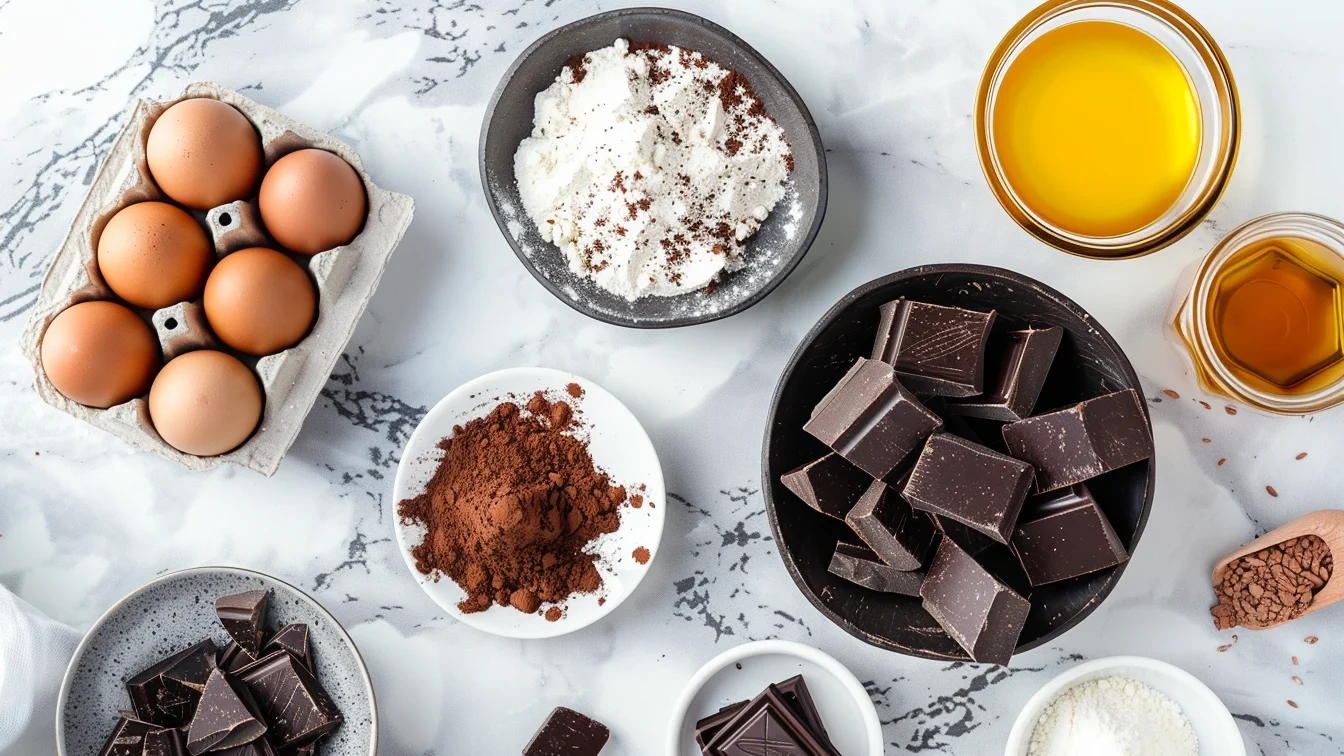
Everything You Need to Make This Chocolate Fudge Cake
Here’s everything you need to make this chocolate fudge cake from start to finish.
For the Chocolate Fudge Cake Layers
- 2 cups (250g) all-purpose flour
- 2 cups (400g) granulated sugar
- ¾ cup (75g) unsweetened cocoa powder
- 2 tsp baking powder
- 1½ tsp baking soda
- 1 tsp fine salt
- 2 large eggs, room temperature
- 1 cup (240ml) buttermilk, room temperature
- 1 cup (240ml) hot strong coffee (enhances the chocolate flavor without adding a coffee taste)
- ½ cup (120ml) vegetable oil
- 2 tsp pure vanilla extract
For the Salted Caramel
- 1 cup (200g) granulated sugar
- 6 tbsp (85g) unsalted butter, cubed and room temperature
- ½ cup (120ml) heavy cream, warm
- 1 tsp flaky sea salt
For the Salted Caramel Buttercream
- 1 cup (225g) unsalted butter, room temperature
- 3 cups (360g) icing sugar, sifted
- 3–4 tbsp salted caramel (from the batch above)
- 1–2 tbsp heavy cream
- Pinch of fine salt
For the Dark Chocolate Ganache
- 200g (7 oz) dark chocolate, at least 70% cocoa, finely chopped
- ¾ cup (180ml) heavy cream
- 1 tbsp unsalted butter (for extra gloss)
Your Complete Guide to Building This Chocolate Fudge Cake
Step 1 — Make the Salted Caramel
This is your starting point. Give the caramel enough time to cool down fully before it touches the buttercream — warm caramel will melt everything.
Place the sugar in a heavy-bottomed saucepan over medium heat. Don’t walk away. Stir slowly and consistently as the sugar starts to melt. It will look clumpy at first — that’s fine. Keep going until every grain has dissolved into a deep, glossy amber liquid.
The moment the color turns rich and golden, drop in all the butter at once. Expect a dramatic bubble — it’s supposed to do that. Stir steadily until the butter disappears completely into the caramel.
Next, pour the warm heavy cream in a slow, steady stream. Keep stirring as it bubbles up again. Give it a full minute on the heat, then pull it off the stove. Stir in the flaky sea salt, then transfer everything into a clean heatproof jar. Leave it on the counter until it reaches room temperature, then move it to the fridge.
If the mixture clumps or turns grainy at any point, lower the heat and keep stirring. It always comes back.
Step 2 — Make the Chocolate Fudge Cake Layers
Heat your oven to 175°C / 350°F. Prepare two 8-inch cake pans by greasing them well and lining the bases with parchment paper.
Grab a large bowl and combine all your dry ingredients — flour, sugar, unsweetened cocoa powder, baking powder, baking soda, and salt. Whisk them together until evenly mixed, then set the bowl aside.
In a separate jug or bowl, beat together the eggs, buttermilk, oil, and vanilla extract until smooth. Add the wet mixture to the dry ingredients and fold everything together gently until no dry flour remains visible. Stop as soon as the batter comes together — working it too hard at this stage tightens the gluten and makes the cake dense in the wrong way.
Now pour in the hot coffee in a slow stream, stirring gently as you go. The batter will look quite thin. That’s exactly what you want — it bakes into a wonderfully dense, fudgy cake layer.
Split the batter evenly between the two prepared pans and slide them into the oven. Bake for 30 to 35 minutes. Check doneness by inserting a toothpick into the center — it should come out with just a few moist crumbs clinging to it, not wet batter.
Leave the cakes in their pans for 15 minutes before turning them out onto a wire rack. They need to cool down completely — no shortcuts here. Frosting a warm cake is a fast way to end up with a melted mess.
Step 3 — Make the Salted Caramel Buttercream
Drop the room temperature butter into your stand mixer bowl. Beat it on medium-high for a solid 3 to 4 minutes. You’re looking for it to turn pale, almost white, and noticeably fluffy. This step is what gives the buttercream its light texture — don’t rush it.
Reduce the speed to low and add the sifted icing sugar one cup at a time. Adding it all at once creates a cloud of sugar dust and an uneven texture. Slow and steady works better here.
Once all the sugar is in, spoon in 3 to 4 tablespoons of your cooled salted caramel along with the heavy cream and a small pinch of salt. Increase the speed back to medium-high and beat for another 2 to 3 minutes. The buttercream should be smooth, fluffy, and hold its shape on a spatula.
Give it a taste. If you want more caramel flavor, add another spoonful. If it feels too stiff, a little more cream loosens it right up.
Step 4 — Make the Dark Chocolate Ganache
Chop the dark chocolate into small, even pieces and place them in a heatproof bowl. Smaller pieces melt faster and more evenly — worth the extra minute of chopping.
Set the heavy cream over a gentle heat and let it slowly come to temperature — you’re not rushing it, just warming it through. The moment you see the first bubbles breaking the surface around the edges, take it off the heat. You want it hot, not boiling — boiled cream can make the ganache grainy.
Pour the hot cream directly over the chopped chocolate. Leave it completely undisturbed for two full minutes. Then add the butter and begin stirring from the center of the bowl, working your way outward in slow, steady circles. The ganache will come together into something glossy and smooth.
Set it aside to cool for 10 to 15 minutes. You need it thick enough to cling to the cake but still fluid enough to drip naturally down the sides. If it firms up too much before you’re ready, warm it for 10 seconds in the microwave and stir again.
Step 5 — Assemble the Cake
Check the tops of your cake layers. If either one has domed up during baking, run a serrated knife across the top to level it. Flat layers stack cleanly and make frosting much easier.
Set the first layer down on your cake board or serving plate. Spoon a generous amount of salted caramel buttercream on top and spread it to the edges. Then drizzle 2 to 3 tablespoons of salted caramel directly over the buttercream layer — it soaks in slightly and adds an incredible depth of flavor between the layers.
Place the second cake layer on top and press down very gently to settle it in place.
Now apply your crumb coat — a thin layer of buttercream spread all over the outside of the cake. This first coat isn’t meant to look perfect. Its job is to seal in any loose crumbs so they don’t show up in your final layer. Once it’s on, put the cake in the fridge for 20 minutes.
After chilling, apply the final buttercream layer. Take your time smoothing the sides and top. A cold cake is much easier to frost cleanly — the buttercream grips better and doesn’t drag.
Chill the finished cake for another 20 minutes before touching it with the ganache. Cold surface, better drips.
Pour the ganache slowly over the center of the top. Let gravity do most of the work. Use a spoon or small offset spatula to gently guide it toward the edges — it will fall over the sides naturally. Scatter a pinch of flaky sea salt across the top if you like.
Leave the cake at room temperature for 30 minutes before cutting. The ganache needs time to set properly, and the slices will be much cleaner for it.
Expert Tips for the Fudgiest Chocolate Cake Every Time
Swap water for coffee in the batter. Hot coffee is one of the most effective ways to boost chocolate flavor in baking. It doesn’t add a coffee taste — it just makes the cocoa powder bloom more fully, which gives the cake a richer, deeper chocolate note that water simply can’t achieve.
Take your ingredients out of the fridge early. Ingredients straight from the fridge don’t blend well together — the fat seizes up and the batter ends up lumpy or split. A 30 to 45 minute head start on the counter makes a real difference.
Always apply a crumb coat first. Skipping this step almost always results in a frosted cake with visible dark crumbs caught in the buttercream. The crumb coat acts as a seal. It takes five extra minutes and saves the finish of your final layer.
Chill the cake before adding the ganache. A cold surface slows the ganache down as it hits the cake, giving you more control over where and how it drips. It also sets firmer and looks sharper once it hardens.
Batch the salted caramel ahead of time. It keeps well in the fridge for up to 10 days and in the freezer for up to 3 months. Having it ready in advance means assembly day is fast and low stress. Pour any leftover caramel over vanilla ice cream, stir it into your morning oatmeal, or spread it on toast — it won’t last long.
Variations worth trying:
- Richer batter: Stir half a cup of melted dark chocolate into the batter after combining wet and dry ingredients. It makes the cake layers even denser and more intensely chocolatey.
- Chocolate chip surprise: Fold semi-sweet chocolate chips into the batter just before pouring it into the pans. They melt slightly during baking and create little pools of chocolate inside each slice.
- Milder ganache: Not a fan of very dark chocolate? Use milk chocolate instead. The ganache will be sweeter and creamier, which pairs beautifully with the salted caramel.
- Extra layer: Split the batter between three pans instead of two for a taller, more dramatic cake. Each layer will be thinner but the overall height and presentation are stunning.
- Gluten-free swap: Replace the all-purpose flour with a certified 1:1 gluten-free flour blend. The crumb will be slightly different but still moist and delicious.

How to Serve and Store Your Chocolate Fudge Cake
Bring it to room temperature before serving. This cake lives in the fridge but performs best at room temperature. Pull it out about 30 minutes before you plan to cut it. The buttercream softens just enough to become creamy rather than firm, and the ganache loses that hard, cold edge.
Pair it with something cold and simple. A scoop of good vanilla ice cream alongside a slice creates a contrast that makes both things taste better. The cold creaminess balances the richness of the chocolate and caramel without competing with it.
Serve with a dark roast coffee or espresso. Bitter coffee and rich chocolate are one of those combinations that make complete sense. The bitterness cuts through the sweetness of the cake and makes every bite taste more layered and interesting.
Add flaky salt right before serving. Salt sprinkled on at the last minute stays crunchy and hits differently than salt that’s been sitting on the ganache for hours. It’s a small detail that makes the whole thing taste more alive.
Use a hot knife for clean slices. Run the blade under hot water, dry it quickly with a cloth, and cut. Wipe the blade between each slice. You’ll get those picture-perfect cross-sections that show off every layer of cake, buttercream, and caramel.
Storing leftovers: Cover the cake well and keep it in the fridge. It stays in great condition for up to 5 days — and honestly tastes even better on day two once everything has settled together. For longer storage, slice it up, wrap each piece individually in cling film, and freeze. It keeps well for up to 2 months. Thaw slices in the fridge overnight or on the counter for an hour.
The Last Chocolate Fudge Cake Recipe You’ll Ever Need
This chocolate fudge cake with salted caramel buttercream, salted caramel, and dark chocolate ganache is the kind of recipe that earns a permanent spot in your baking rotation. It’s rich without being heavy, sweet without being cloying, and easy enough that you don’t need a special occasion to justify making it.
Every component serves a purpose. The hot coffee in the batter makes the chocolate deeper. The buttermilk keeps the cake layers moist for days. The salted caramel cuts through the richness and ties everything together. The dark chocolate ganache brings it all home.
Whether it’s a birthday cake, a dinner party showstopper, or just a weekend project you’ve been craving — this is the one. Make it once and you’ll understand why it keeps coming back.
Happy baking!
Chocolate Fudge Cake — Your Questions Answered
What’s the difference between chocolate cake and chocolate fudge cake? A classic chocolate cake tends to be lighter and fluffier, with a softer crumb. A chocolate fudge cake is denser, richer, and more intensely chocolatey — closer to a brownie in texture. The higher fat content from oil and buttermilk, combined with a higher ratio of cocoa powder, gives a fudge cake its signature moist and fudgy character.
What cake is safe for diabetics? For a diabetic-friendly option, you can adapt this recipe by using almond flour in place of all-purpose flour, a sugar substitute like erythritol or monk fruit sweetener, and unsweetened cocoa powder — which is already in this recipe. Always consult a healthcare professional for specific dietary guidance, as individual needs vary. A smaller slice alongside a protein-rich meal also helps manage blood sugar response.
What’s the secret to a moist fudge cake? Three things: oil instead of butter in the batter (oil stays liquid at room temperature, which keeps the cake moist longer), buttermilk for tenderness, and hot coffee to bloom the cocoa powder and enhance the chocolate flavor. Avoiding overbaking is equally important — pull the cake out as soon as the center comes out clean with a few moist crumbs.
What do I need to make a chocolate fudge cake? The essentials are: unsweetened cocoa powder, all-purpose flour, sugar, eggs, buttermilk, vegetable oil, baking powder, baking soda, and hot coffee. For this specific recipe, you’ll also need dark chocolate for the ganache, unsalted butter and icing sugar for the buttercream, and sugar, butter, and cream for the salted caramel. All standard ingredients — nothing hard to find.