
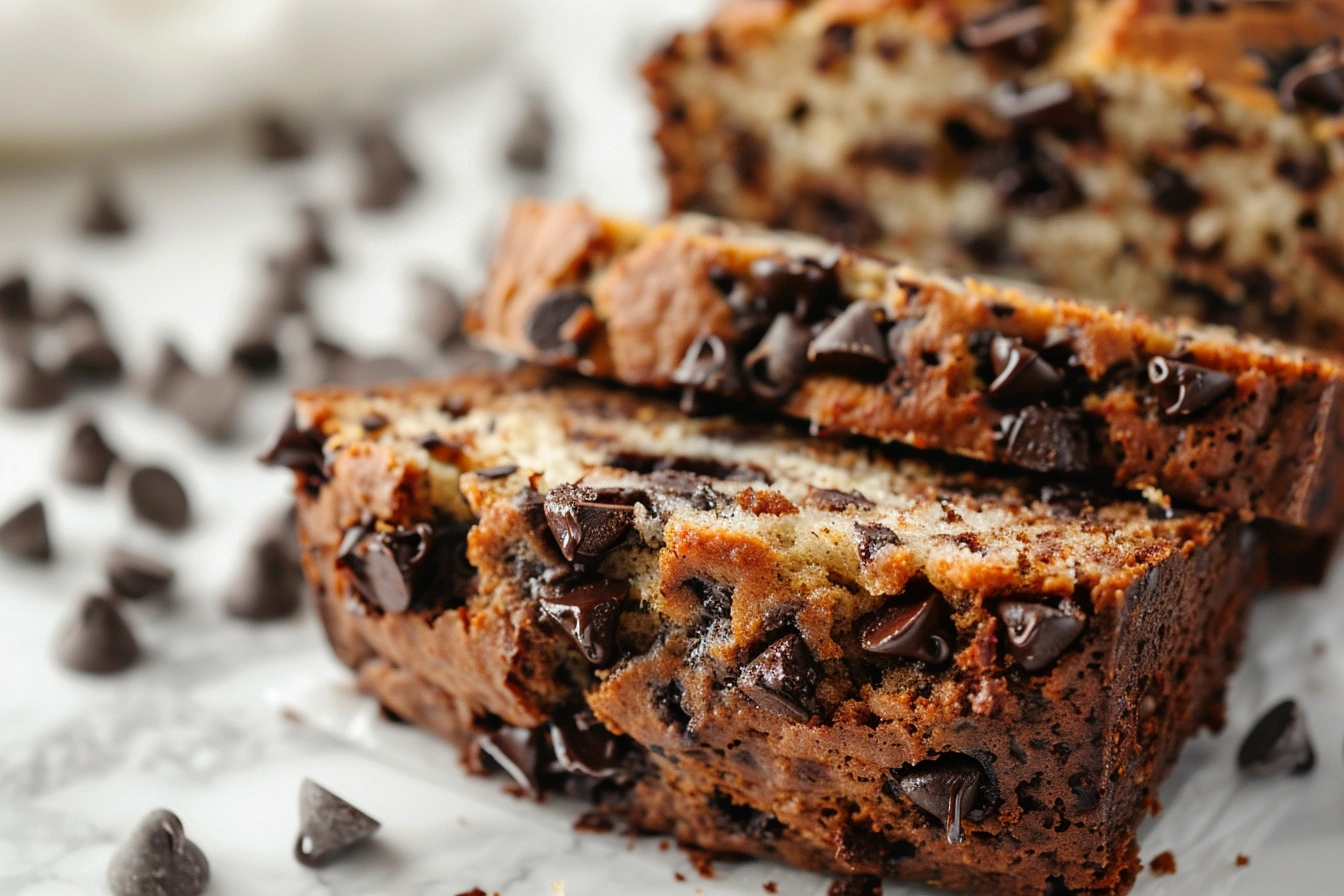
There’s something magical about the combination of ripe bananas and melted chocolate. This chocolate chip banana bread is moist, rich, and comforting — the kind of homemade treat that fills your kitchen with a warm, sweet aroma.
I remember the first time I made this bread. My bananas had turned completely brown, spotted and soft. Instead of tossing them, I decided to bake something special. The result? A golden loaf so tender and packed with chocolate chips that my family devoured it within hours.
This moist chocolate chip banana bread is different from standard bread recipes. The secret lies in using those perfectly overripe bananas – the ones with dark spots that most people throw away. Those bananas create incredible moisture and natural sweetness. Add melted butter instead of oil, and you get a richer, more flavorful bread.
The chocolate chips aren’t just mixed in – they’re folded throughout the batter and sprinkled generously on top. Every slice reveals pockets of gooey, melted chocolate.
What makes this the best banana bread? It stays moist for days. The texture is tender but not cake-like. It slices cleanly without crumbling. And the banana flavor shines through without being overwhelming.
This recipe works as breakfast, a snack, or dessert. Serve it warm with butter. Pack slices in lunchboxes. Turn it into banana muffins for portion control. However you enjoy it, this chocolate chip banana bread recipe delivers every time.
The best part? It’s a one-bowl recipe. No mixer required. Simply mash your bananas, combine ingredients, gently fold in the chocolate chips, then pop it in the oven. Even beginner bakers get perfect results.
Key Benefits
Super Moist Texture
This bread stays moist for days thanks to ripe bananas and real butter. The moisture comes from the bananas themselves, which act as a natural binder. Sour cream adds extra richness without making the bread heavy.
Perfectly Balanced Sweetness
The bananas provide natural sweetness, so you don’t need excessive sugar. Brown sugar adds depth with its molasses notes. The chocolate chips contribute sweetness in bursts rather than overwhelming the entire loaf.
Loaded with Chocolate
Every bite contains pockets of melted chocolate. Semi-sweet chocolate chips provide ideal sweetness without being overpowering. The chocolate chips on top create a beautiful presentation and guarantee chocolate in the first bite. Mini chocolate chips work wonderfully if you prefer chocolate throughout every single bite.
Simple One-Bowl Method
No need to dirty multiple bowls or pull out an electric mixer. Everything comes together in one bowl with just a fork and spatula. Your prep work takes only 10 minutes from start to finish.
Freezer-Friendly Convenience
Bake a loaf, slice it, and freeze individual portions. Wrapped correctly, this bread keeps its quality for months. Pull out slices whenever you need a quick breakfast.
Uses Overripe Bananas
Those brown, spotted bananas work perfectly for this recipe. Use very ripe bananas – the darker, the better. This bread transforms what you might throw away into something delicious.
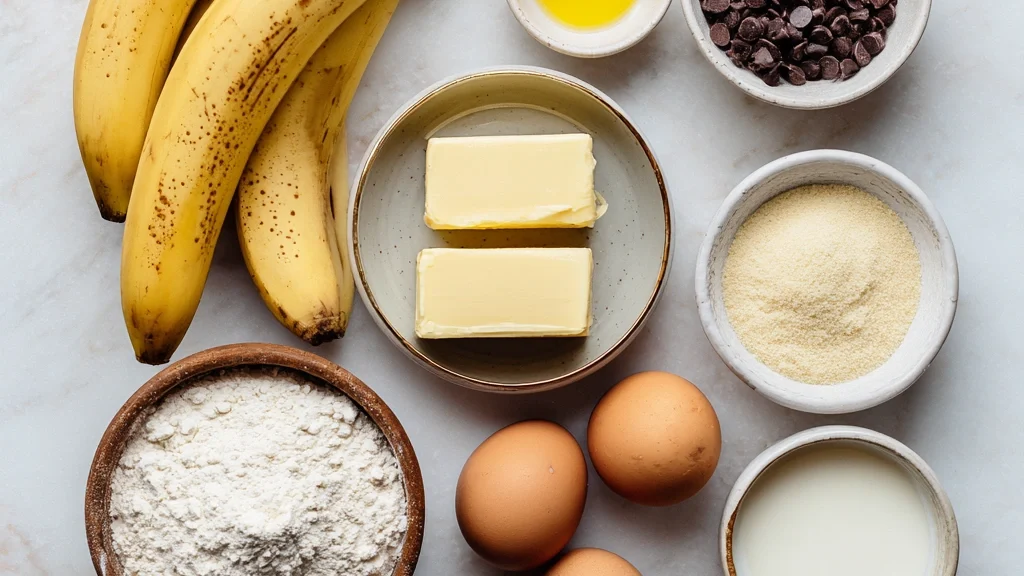
Ingredients
Dry Ingredients
- 1 ½ cups (190g) all-purpose flour (scoop and level for accuracy)
- 1 tsp baking soda
- ½ tsp salt
Wet Ingredients
- 3 large ripe bananas, mashed (this should give you roughly 1 ½ cups)
- ½ cup (115g) unsalted butter, melted
- ½ cup (100g) brown sugar (packed)
- ¼ cup (50g) granulated sugar
- 2 large eggs (at room temperature)
- 1 tsp vanilla extract
- ¼ cup (60g) sour cream
Add-Ins
- ¾ cup (130g) semi-sweet chocolate chips (plus extra for topping)
- Optional: ½ cup mini chocolate chips
- Optional: ½ cup chopped walnuts or pecans
Instructions
Step 1 – Prep Your Pan and Oven
Preheat your oven to 350°F (175°C). This temperature guarantees even baking without burnt edges. While heating, prepare your 9×5-inch loaf pan. Coat it thoroughly with butter or cooking spray. Line the bottom and sides with parchment paper, leaving overhang on the long sides for easy removal.
Why parchment? It prevents sticking completely. Even well-greased pans can grip bread sometimes. The paper guarantees your loaf slides out perfectly. It also makes cleanup effortless.
Step 2 – Mash the Bananas
Put your ripe bananas in a large mixing bowl. Grab a fork and mash them thoroughly. I like leaving some small chunks – they create concentrated bursts of banana flavor. Mash until mostly smooth with a few lumps remaining. This should give you roughly 1 ½ cups of mashed banana.
The riper your bananas, the better this bread turns out. Look for bananas with brown spots covering most of the peel. They should feel very soft when you squeeze them. These bananas perfect for banana bread provide maximum moisture and natural sweetness.
Step 3 – Combine Wet Ingredients
Stir melted butter into the mashed bananas. Whisk until blended. The mixture might look a bit separated – that’s completely normal. Add both sugars (brown and granulated) and whisk hard for about 30 seconds. Crack in the eggs, one at a time. Whisk after each addition. Add the vanilla extract and sour cream. Whisk together until smooth.
The wet ingredients should look creamy and smell amazing at this point. That banana-vanilla-butter combination is irresistible.
Step 4 – Add Dry Ingredients
Grab another bowl and whisk the flour, baking soda, and salt until combined. Pour the dry ingredients over the wet mixture. Using a spatula, fold gently. Don’t overmix. Continue folding only until all dry flour disappears into the mixture.
Your batter should look thick yet pourable. It won’t be as smooth as cake batter – that’s expected. Those small lumps vanish during baking.
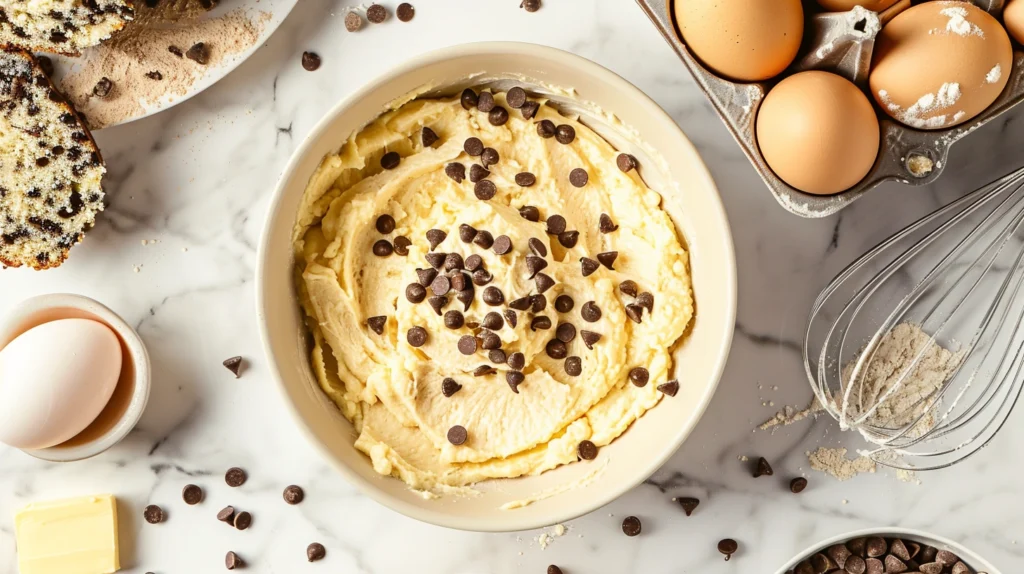
Step 5 – Fold in Chocolate Chips
Take ¾ cup of chocolate chips and stir them into your batter. Save the remaining chocolate chips for the top. With your spatula, fold in the chocolate chips using just a few gentle strokes.
Some bakers prefer milk chocolate chips for extra sweetness. Others like dark chocolate for contrast. Semi-sweet chocolate chips provide the perfect middle ground. Mini chocolate chips distribute more evenly if you want chocolate in every bite.
Step 6 – Transfer Batter to Pan
Pour the batter into your prepared loaf pan. Scrape every bit from the bowl with your spatula. Spread the batter evenly, nudging it into the corners. The surface doesn’t need perfect smoothness – rustic works fine.
Sprinkle the saved chocolate chips on top. Gently press them so they adhere. This creates that bakery-style look with visible chocolate. The top chocolate chips also keep the surface from looking dry.
Step 7 – Bake to Perfection
Set the loaf pan on your oven’s middle rack. Bake for 55-65 minutes. Exact time depends on your oven and banana moisture. Keep the oven door closed for the first 50 minutes – opening it causes the bread to sink.
Around the 55-minute mark, test for doneness. Poke a toothpick into the center. A clean toothpick with maybe some moist crumbs clinging to it signals that your bread is ready. If the top browns too quickly, tent it with aluminum foil.
When done, the bread will spring back slightly when pressed gently. The edges pull away from the pan slightly. It smells absolutely amazing – sweet, buttery, with hints of banana and chocolate.
Step 8 – Cool Properly
Pull the pan from the oven and transfer it to a wire rack. Give the bread a 10-minute rest while still in the pan. This brief cooling allows the structure to set. If you try to remove it immediately, the bread might break.
After 10 minutes, use the parchment paper handles to lift the loaf out. Transfer it directly onto a wire rack to cool completely. Cooling on a rack prevents the bottom from getting soggy. Air circulates all around, creating the perfect texture.
Give it a minimum of 30 minutes cooling time before you slice into it. I know it’s tempting to cut into it immediately, but patience pays off. Warm bread crumbles and tears. Cooled bread slices cleanly, showing off those beautiful chocolate pockets.
Once completely cool, the bread stays moist for days when stored properly. The flavors actually deepen overnight as everything melds together.
Pro Tips and Variations
Choosing the Right Bananas
Accelerate the ripening process by storing bananas with an apple inside a paper bag. The ethylene gas speeds up ripening. In 1-2 days, your green bananas transform into bananas perfect for banana bread. Alternatively, place them on a baking sheet and roast at 300°F for 15-20 minutes until the peels turn black. Let them cool, then use immediately.
Frozen ripe bananas work beautifully. Let them thaw fully and pour off any extra liquid before you mash them.
Making Muffins Instead
Transform this recipe into banana muffins. Line a muffin tin with paper liners. Fill each cup about ⅔ full. Pop them in the oven at 350°F for 18-22 minutes, checking with a toothpick to ensure the centers are fully baked.
Muffin portions are perfect for meal prep. They freeze individually and thaw quickly. Kids love them for breakfast or snacks.
Texture and Mixing Tips
Don’t overmix once you add the flour. Stir only until all dry flour disappears. Some lumps in the batter are normal – they’ll vanish during baking.
Chocolate Variations
Try dark chocolate chunks for a more sophisticated flavor. Experiment with different chocolate chips varieties – try pairing semi-sweet with milk chocolate chips, or toss in some white chocolate for contrast. Some bakers swirl Nutella into the batter before baking.
Storage and Freshness
Your bread keeps its moist texture for up to 3 days at room temperature if you wrap it in aluminum foil. Don’t refrigerate – it actually dries out bread faster.
For longer storage, wrap the cooled loaf tightly in plastic wrap, then aluminum foil. Freeze for up to 3 months. Thaw overnight at room temperature.
Common Problems Solved
If your bread sinks in the middle, you likely overmixed the batter or opened the oven door too early.
If the top browns too quickly but the center isn’t done, tent with foil after 40 minutes.
If your bread turns out dry, your bananas might not have been ripe enough, or you added too much flour.
Making It Your Own
Add a cream cheese swirl for tangy richness. Beat 4 oz softened cream cheese with 2 tbsp sugar and 1 egg. Spoon dollops into the batter and create swirls using a knife.
Incorporate nuts for crunch. Stir ½ cup of chopped walnuts or pecans into the batter along with the chocolate chips.
Add spices for warmth. A teaspoon of cinnamon or ½ teaspoon of nutmeg complements the banana beautifully.
Serving Suggestions
Perfect Pairings
Serve warm slices with salted butter melting into every bite. Cream butter lightly with honey for an extra-special spread. Cream cheese makes an excellent topping too.
This bread pairs perfectly with your morning coffee or afternoon tea. The chocolate chips complement espresso drinks especially well.
For breakfast, toast a slice and top with sliced bananas and a drizzle of honey.
Presentation Ideas

Cut the loaf into generous slices and display them on a wooden board. Add fresh berries and mint leaves. Dust with powdered sugar for a refined presentation.
Place individual slices on plates alongside a scoop of vanilla ice cream for a dessert that impresses.
For gifting, wrap a cooled loaf in parchment, tie with twine and attach a recipe card. Bread gifts always feel personal and thoughtful.
Creative Uses
Turn stale bread into French toast. Dip thick slices in an egg mixture, then pan-fry until golden. As the chocolate chips warm up, they form delicious pockets of melted chocolate. Top with maple syrup and berries.
Make bread pudding by cubing stale slices, soaking them in custard, and baking until set.
Conclusion
This moist chocolate chip banana bread represents everything great about home baking. It transforms overripe bananas into a loaf that disappears within days. The combination of banana, butter, sour cream, and chocolate chips creates texture and flavor that bread from a bakery can’t match.
What makes this the best banana bread recipe? The texture stays moist for days. The chocolate chips appear in every slice. The banana flavor shines without being overwhelming. And the recipe itself is simple enough for beginners yet delivers results that impress everyone.
I’ve followed the recipe countless times, and it turned out perfect every single time. I’ve made this recipe for neighbors, brought it to potlucks, and gifted it during holidays. People absolutely loved this recipe and ask for it immediately.
The versatility adds to its appeal. Bake a full loaf for the family, or divide the batter into the prepared muffin tins for individual portions. This banana bread recipe adapts to your preferences while maintaining its essential character.
Whether you’re an experienced baker or someone who rarely turns on their oven, this recipe works. If you love this recipe, make this recipe part of your regular rotation. Those brown bananas on your counter represent potential.
Make chocolate chip banana bread today. Share it with people you love. Watch it disappear. This favorite banana bread delivers on all counts. Your kitchen deserves the aroma of freshly baked bread. This really delicious treat is one of those bread recipes that becomes a household favorite.
FAQs
Q1: Can I make this without sour cream?
Yes. Replace sour cream with Greek yogurt, regular yogurt, or buttermilk. The bread remains moist with any substitution. Without these alternatives, simply increase the melted butter by one tablespoon.
Q2: My bananas aren’t ripe yet. Can I speed up the process?
Place unripe bananas in apaper bag with an apple. Check daily – they should ripen within 2-3 days. For immediate use, place them on a baking sheet and roast at 300°F for 15-20 minutes until the peels turn black.
Q3: Why did my bread sink in the middle?
A sunken center typically indicates overmixed batter or premature oven door opening. Fold ingredients only until combined, and resist peeking for the first 50 minutes of baking.
Q4: Can I reduce the sugar?
Lower the granulated sugar by ¼ cup if you prefer. Your bread becomes less sweet but stays delicious since bananas contribute natural sweetness.
Q5: How do I know when the bread is done?
Poke a toothpick into the bread’s center. When it pulls out mostly clean with only a few damp crumbs sticking to it, you’re done baking. Expect this anywhere between 55-65 minutes depending on your oven.
Q6: Can I turn this into muffins?
Yes. Line a standard muffin tin with paper liners. Fill each cup about ⅔ full. Pop them in a 350°F oven for 18-22 minutes. Banana muffins cool much faster than a loaf and offer built-in portion control.